cover photo by Randy Fath on Unsplash.
I've not, for once, thought of this phrase "build minutes", until I got a mail concerning it from netlify on how I was kinda (wasting) misusing them.

In this article, I'm just going to go over two methods that you can follow to optimize your build minutes. in the image above, it showed that I've moved above 50% of my build time billing limit, and when eventually, I exceed the limit, I'd have to start paying for the service.
method one: turning off netlify build
If your site/project is linked to a git repository, netlify will build your project by default as long as you keep pushing changes to the repository.
You might want to stop netlify from building your site if, for example, you want to:
- Stop some functionalities on your app/project for a period of time, and after a while push a new update.
- Review/merge a particular pull request or a series of smaller commits and then activate your build process again, after you've pushed the latest change to the repository.
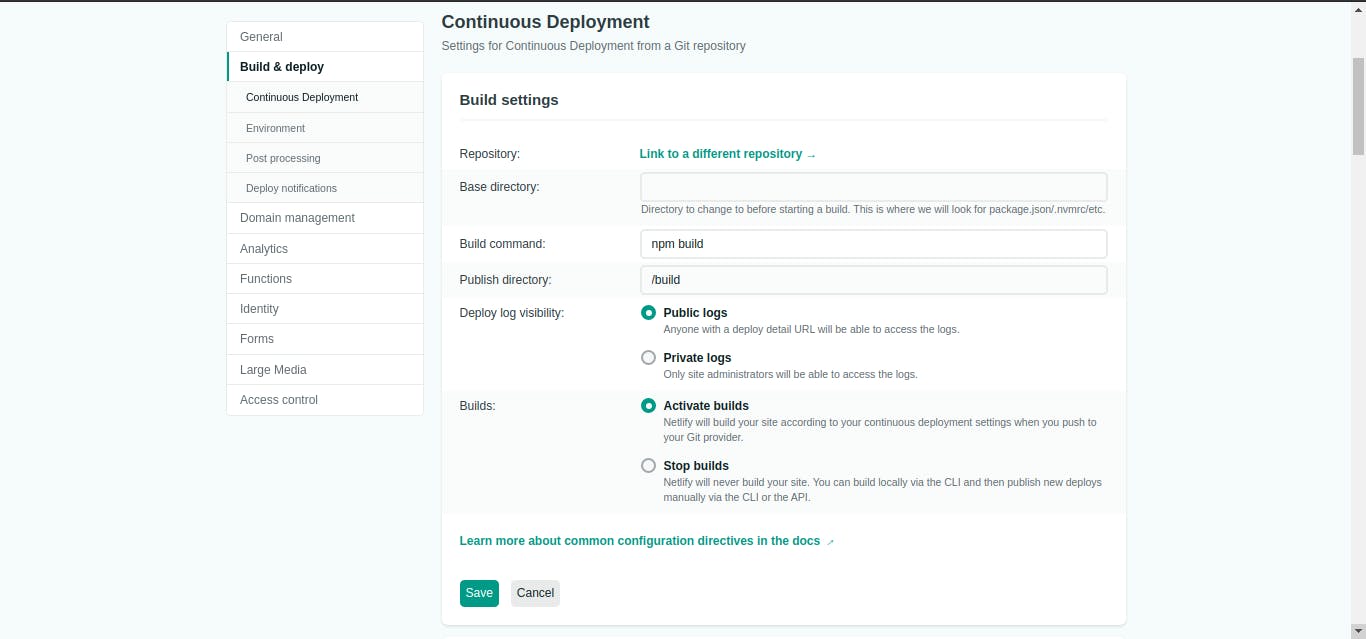
To stop your netlify build, login to your account on netlify, choose the site you want to update, go to Settings > Build & deploy > Continuous deployment > Build settings choose edit settings and then click on stop builds to stop builds.

method two: turning off deploy previews
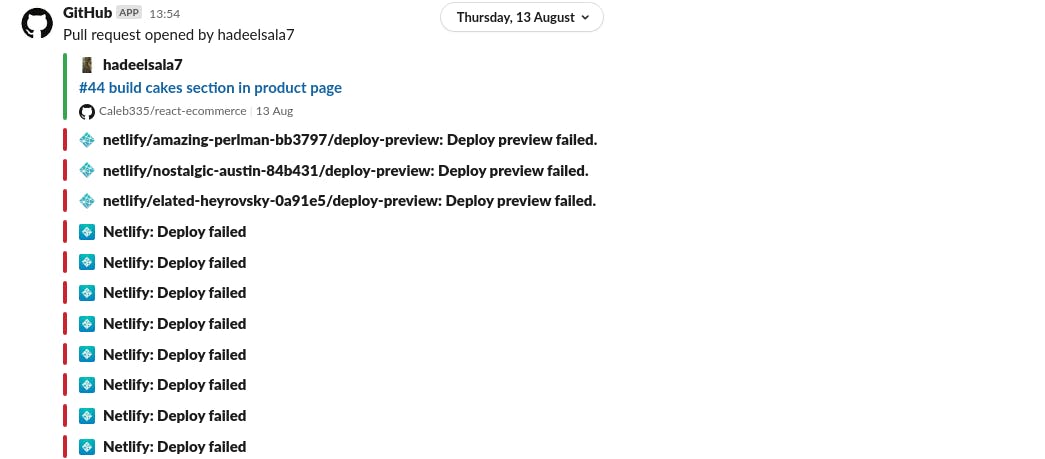
Deploy previews are those checks that you might have seen in some pull requests on GitHub. they show the details of a particular PR and a link that shows the particular change that has been deployed. An example of deploy previews is shown below.

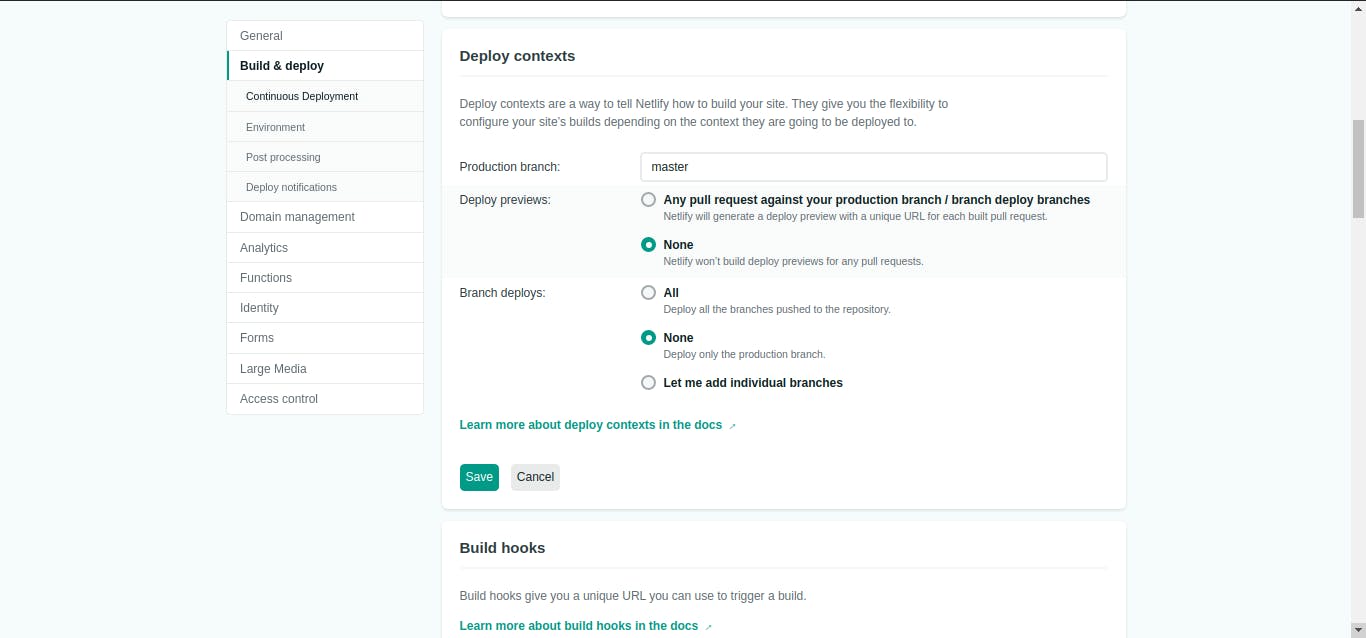
To turn off deploy previews, go to Settings > Build & Deploy > Deploy Context click on edit settings and click on none to turn off deploy previews.

Thank you for reading. If this article helped you understand some concepts, please do not hesitate to share it with your colleagues.
You can check the other methods of optimizing your build time in the netlify docs
